How to grow your living gazebo
As you know, everything new is well forgotten old. And now we’ll talk about a new product that was once very fashionable in noble estates, about a lively gazebo.
This type of garden architecture requires investment of not small forces and great patience. The final result will not be visible right away, but a gardener who has reached his goal will rightfully be rewarded. The first results will be noticeable in the most favorable combination of circumstances after 4 years of work, but even if nature, weather and circumstances are opposed, the stubborn gardener will be able to proudly demonstrate his work no later than 8 years after the start of work.


So, it’s worth starting the construction of a live gazebo with the definition of your wishes. It is necessary to choose which trees will form a gazebo from their trunks and branches. The choice of specific plants depends on what size arbor is planned to grow.
Conditionally, the following division exists:
- high.
- medium height.
- low.
You can use any shrubs and dwarf trees, the only important thing is that they do not grow strongly in height. Seedlings should be taken about 1 m tall, without low side branches. In the future, it will be easier to work on the formation of the crown in the right way.
Then you need to choose a place to land. The best option would be an open space, fully lit by the sun. It is good if the soil at the selected place was fertile, and the occurrence of groundwater at a depth of not less than 1.5 meters.
After choosing a place, you need to mark the position of the future structure, designating the places for planting trees with pegs and connecting from twine.
The construction of a pergola (a base that supports the shape of a future gazebo) is the next and very crucial stage. To a large extent, it affects the success of further work. After the arbor is formed, the framework framework will need to be disassembled, this will be the completion of the work. In the future, the gazebo will require only care.
Metal parts must be coated with a primer, and wooden ones should be treated with an antifungal compound. Materials necessary for the arbor frame:
- timber with a square section of 100 mm;
- metal corners, 1.2 meters each;
- timber with a section of 50 mm;
- self-tapping screws.
The assembly procedure for the frame is simple, but requires accuracy.
DIY live gazebo: step-by-step instructions
- Corners are driven into the ground in places designated for installing the main supports to a depth of 1 m, in pairs, so as to hold the wooden support. When dismantling the frame, the corners are much easier to get out of the ground than digging out concrete screeds, which usually fix various frames.
- Strictly vertical installation of pillars is required, otherwise the gazebo will “plague” subsequently. The columns installed vertically are connected by bars, horizontally, fixing them 40 cm from the ground, and so every 40 cm to the desired height.
- Trees need to be planted at the same time, in the middle of the distance between the posts, exactly along the line connecting the posts. All trees, immediately after planting, need to be watered (at least 10 liters of water for each seedling). Be sure to water once a week, until the appearance of new leaves, and then weekly. In the second year it will be possible to water only in very dry weather, as the trees will already have a sufficiently developed root system to feed on groundwater.
- To start the formation of the crown of trees, you need to trim their tops at the level of about 70-90 cm, for the active development of the side branches.
- In the spring, the trees will give new branches, one of which will assume the role of the top. This branch must be attached to the pergola so that it tends strictly upward, and 2 side branches on the right and left need to be attached to the first horizontal bar of the pergola. The remaining branches can be allowed to grow as they please.
- In autumn, the top again needs to be trimmed, leaving 10-15 cm above the level of the second crossbar.
- In the second year, the trees will again start up a new peak on last year’s crown, it again needs to be fixed vertically, as last time. Cut all other fresh shoots to a length of 15-20 centimeters, and fix the two side branches again, but to the second crossbeam of the frame.
- In the fall, again shorten the apex to 15-20 cm above the third crossbeam of the frame.
- This order of trimming and fixing the leading branches must be repeated every year until the trees grow to the desired height. Over time, the side branches will begin to intertwine with each other, forming the intended shape of the arbor.
- In spring, you need to trim the branches that go from the branches of the second order. It is also necessary to remove dried and diseased branches. After a few years, the trunks will become woody, and the branches will be intertwined, independently maintaining their shape. The supporting structure can be dismantled. For better preservation of a lively arbor, it is better to cut the base of the frame and extract it from the interweaving of branches in parts.
Let's consider one more variant of a live arbor from a rod in a photo


A completed gazebo requires constant care. It is necessary to prune young shoots every year, I continue to form crowns, remove dried branches, and process the arbor from pests.
Watch the video: Gazebo Tour 2019 Questions Answered and Updates (January 2025).


-
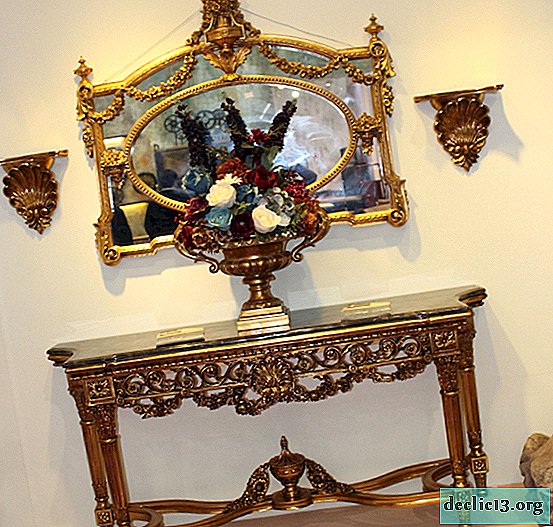
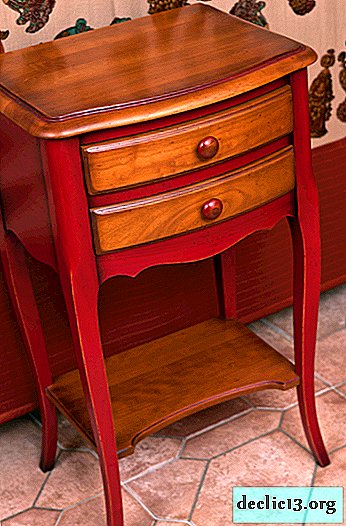
Features of French furniture, the nuances of choice
True masterpieces do not go unnoticed, because French furniture has had a lot of fans in all ages. She was always chic, elite and popular, she never went out of fashion. It is impossible to confuse it with other models of ethnic styles. The presence of French charm brings elegance, charm, luxury and provincial simplicity to home comfort. ... -

-
-