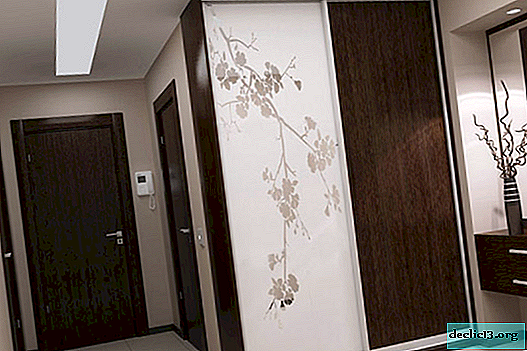
How to make a cabinet for shoes with your own hands, expert advice
Often in the process of designing and arranging various rooms, people encounter certain difficulties, since it is not possible to choose the optimal furniture for the chosen style. In this case, the independent solution is the independent manufacture of various interior items. In the hallway there may be limited space and unusual shapes of the room, so you create a cabinet for shoes with your own hands, perfectly suitable for the site chosen for it.
Necessary tools and materials
Initially, you should determine what material will be used for work, as well as what shape and dimensions the future design will have. The most commonly used materials for these purposes are:
- MDF, which allows you to get environmentally friendly, reliable, inexpensive and resistant to various influences;
- Particleboard is the most affordable material, but it is important to make sure that there is no formaldehyde in it, and also due to the fragility of the material, you should work with it carefully so as not to damage it;
- plywood has good quality and durability, therefore it is often used to create different interior items, but when using it you need to pay attention and spend money on finishing the created structures;
- natural wood is considered the ideal solution for making a cabinet for shoes with your own hands, as it is environmentally friendly, beautiful and reliable.
If it is not possible to spend a lot of money on a pedestal, then chipboard is selected. If you choose high-quality material, it will be quite durable and reliable, and also with proper care will last a long time. Working with it is incredibly simple, so the process of creating a design does not require significant effort, and you do not need to have any specific skills or use unusual tools.
After selecting the material, the preparation of all the elements that will be applied in the process of work begins, these include:
- chipboard itself, and plates are produced in numerous colors, which makes it possible to create a design for shoes in the hallway, which has an optimal shade;
- accessories designed to open doors if it is intended to create a closed interior item;
- tools, which include a screwdriver and screwdriver, bits for self-tapping screws and confirmations, as well as an awl and drill for confirmations.
For the given design, slabs of two different colors are most often chosen - wenge and light shade, since such a combination provides a really attractive and well-fitting bedside table. No complicated and unusual tools are required for work, as the shoe table is considered easy to create, so specific fasteners or complex joints are not used.
 Instruments
 Materials
Detail
This process involves the exact determination of the dimensions of all the details that will be needed in the process of forming this interior item. Detailing makes it possible to get a really high-quality design in which all the parts have the right dimensions, and also there are no distortions or other shortcomings.
The main details of the future bedside table include:
- roof and bottom of the product - 1100 * 250 mm;
- sidewall and internal support part - 2 parts from chipboard 668 * 250 mm;
- internal shelves located horizontally - 3 parts 526 * 250 mm in size;
- facades - 2 parts 311x518 mm;
- partitions for galoshes located inside the structure - 4 parts 510x135 mm in size, 4 parts - 510x85 mm and 4 parts - 510x140 mm;
- back wall - 1 part measuring 696x1096 mm.
When using such parts, it is possible to obtain a sufficiently voluminous and convenient for use curbstone, equipped with 4 sets of galoshes, handles and thrust bearings.


Parts preparation
As soon as all the necessary drawings are made, on the basis of which the process of creating the structure is carried out, as well as the details are completed, you can begin to prepare the parts. This process is not considered too complicated, so it is easy for beginners to do it.
First, a special scheme of the future bedside table must certainly be made, since it must be used in the formation of various details, otherwise it is likely that there will be different irregularities or other problems in the design.
How to make the details? The procedure for creating them is divided into stages:
- A large paper drawing paper is prepared, onto which the drawings are transferred, so optimal patterns will be obtained;
- they are carefully cut out, and then applied to the chipboard sheets;
- paper is firmly fixed to the plates;
- cutting of parts begins, and for this you can use a jigsaw, a special knife on wood or another tool.
Particular attention should be paid to the evenness of the parts being cut, otherwise the design made as a result will not have perfect evenness.
Another significant point is the edging of parts. You can perform this process with an edge made of paper or plastic. Since all actions are performed at home, paper edge is usually used. This is due to the fact that when using a plastic product, a specialized machine tool and professional expensive glue are required, which is heated to a high temperature before use, which ensures excellent adhesion between the details of the cabinet. Therefore, people who are independently engaged in this work choose paper edges. It is advisable to perform the lining with a sufficiently thick edge, the thickness of which will not be less than 2 mm, so that the shoe cabinet will not only be beautiful, but also resistant to various influences.
 Finished Parts
 Parts are pre-sanded
 The edge is fixed with an iron
 All necessary holes are prepared in advance.
Assembly
As soon as all the details necessary to create a curbstone in the hallway with your own hands are prepared, you can proceed to their connection, which guarantees the assembly of the structure. During the assembly process, you should constantly focus on pre-made drawings, as well as be involved in verification, since often certain parts are created incorrectly, therefore, their correction is required.
To assemble the bedside table correctly, the correct sequence of actions for the implementation of this process is taken into account:
- First, the frame of the future design is assembled, for which 4 main parts are used, and the bottom and cover, as well as two sidewalls, belong to them;
- for the assembly of the box, confirmations are usually used, since anyway different plugs from them will not be visible, and also for this purpose minifixes or furniture corners of suitable size are used;
- after receiving a reliable box, the installation of internal elements begins, and they are fixed to the sides and bottom with the help of confirmations, but they are attached to each other and to the roof using corners of metal;
- then the rear wall of the structure is mounted, and usually it is completely created from a thin fiberboard, since it will not be affected by significant loads, and it will not be used for any purpose, therefore it acts only as a decorative element.
When attaching the rear wall, you can check the evenness of the resulting product, since if there are any distortions, they will be immediately visible, and if they are detected, it is recommended to remake the product.
Thus, assembling a chest of drawers or a cabinet yourself is quite simple. Photos of various such home-made structures are presented below, and each owner of residential real estate has the opportunity to realize their own unique ideas, so an original and unique product will be obtained that is perfectly suitable for a particular corridor.
 Separately assembled box and internal shelves
 Internal shelves are inserted into the case without additional fastening
 Wheel mount
Dressing
Each owner of residential real estate wants to install in different rooms only beautiful and original products. To obtain the most unusual and attractive chest of drawers or cabinets, different methods of decorating the finished structure can be used. You can use the methods for this:
- equipping curbstones with additional shelves of various shapes, located at different levels;
- fastening to the product mirrors, hangers or any other design that is fixed to the wall and does not take up much space, while increasing the functionality of the room;
- original and unusual handles are attached to the doors or other interesting accessories are used;
- it is allowed to paint the finished stand, paste it over with wallpaper or cover it with cloth, and you can also use carvings, decorative films, plaster or rhinestones, and during the application of these elements the style in which the hallway is made is taken into account.
Thus, the decoration of the cabinet designed for storing shoes and made by hand, can be performed by different methods. Each of them has its advantages, and the choice depends on the preferences and capabilities of property owners.Creating your own shoe cabinet is a simple process. It can be easily performed by anyone. This does not require the use of specific tools or expensive materials. A person independently determines what shapes, sizes, colors and other parameters the finished design will have, so it is guaranteed to receive a product that is ideally suited for the corridor.

